
Valve guides are critical for engine performance, ensuring proper valve alignment and reducing wear. Their installation requires precision, involving removal of old guides, precise measurement, and careful seating to maintain engine integrity and efficiency.
Overview of Valve Guides and Their Importance
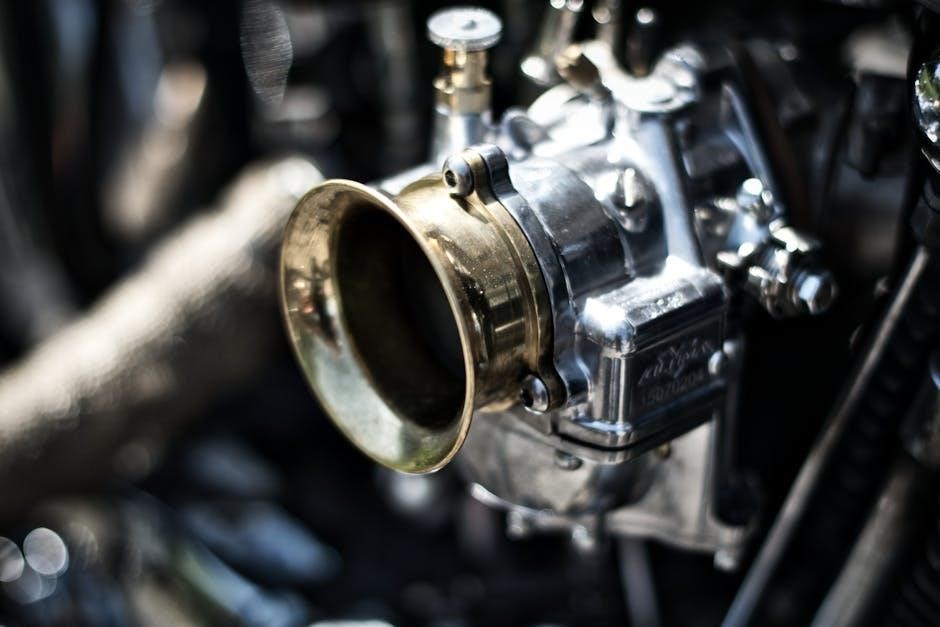
Valve guides are critical components in an engine’s cylinder head, serving as the pathway for valves to open and close properly. They ensure precise alignment, preventing sideways motion that could damage the valve or cylinder head. Guides also play a key role in sealing engine oil, preventing it from entering the combustion chamber. Over time, valve guides can wear out, leading to increased oil consumption, reduced performance, and potential engine damage. Proper installation and maintenance of valve guides are essential for maintaining engine efficiency, preventing costly repairs, and ensuring optimal combustion chamber sealing. Their condition directly impacts engine longevity and overall performance.
Why Valve Guide Installation Is Necessary
Installing valve guides is essential for maintaining proper engine operation and preventing potential damage. Worn-out guides can lead to misaligned valves, causing inefficient combustion and reduced engine performance. They prevent oil leakage into the combustion chamber, which can result in increased oil consumption and emissions. Properly installed guides ensure valves close tightly, maintaining compression and preventing overheating. They also protect against valve damage from misalignment, which can lead to costly repairs. Regular installation of new guides is a proactive step to uphold engine efficiency, prevent breakdowns, and ensure smooth overall engine function. This maintenance is crucial for extending the lifespan of your engine and avoiding more severe issues down the line.
Preparation for Valve Guide Installation
Preparation involves gathering tools, cleaning the workspace, and ensuring safety measures are in place for a smooth process and to avoid potential risks or errors.
Tools and Materials Required
To install valve guides, you’ll need specialized tools like a valve guide installer, reamer, and puller. Essential materials include new valve guides, lubricant, and sealant. Ensure you have a torque wrench, screwdrivers, and protective gear for safety. A well-lit workspace with a stable workbench is also crucial for precision and safety during the process.
Safety Precautions and Workspace Setup
When preparing for valve guide installation, prioritize safety by wearing gloves, safety glasses, and a face mask. Ensure your workspace is well-ventilated, clean, and illuminated to minimize risks. Use a sturdy workbench and secure the cylinder head firmly to prevent movement. Keep power tools and flammable materials apart, and maintain an organized, clutter-free area. Avoid loose clothing and tie back long hair to prevent entanglements with tools. Have a fire extinguisher and first aid kit readily available. Proper workspace setup and adherence to safety guidelines are essential for a smooth and safe installation process.
Removing the Old Valve Guides
Access the cylinder head and use specialized tools like a slide hammer or extractors for safe removal. Apply heat or freezing to aid in loosening stuck guides. Proceed with caution to avoid damage, especially if guides are broken or seized. Consider professional assistance if unsure.
Methods for Removing Valve Guides
Several methods exist for removing old valve guides, each requiring care to avoid damaging the cylinder head. The slide hammer method involves attaching the tool to the guide and using a pulling motion. Thermal shocking uses heat to expand the guide, easing removal. For stubborn guides, freezing the area can help loosen them. In some cases, a drill press may be used to create pilot holes for extraction tools. Combining methods is often necessary, especially for stuck or broken guides. Regardless of the technique, precision is key to prevent cylinder head damage. If unsure, consulting a professional is advisable to ensure a successful removal process.
Using Freezing to Ease Removal
Freezing the valve guide area can significantly simplify the removal process. By applying dry ice or liquid nitrogen, the metal contracts, reducing the bond between the guide and the cylinder head. This method is particularly effective for stuck or corroded guides. Safety is paramount; wear gloves and goggles when handling frozen materials. Allow the area to cool for 15–20 minutes. Once contracted, use a slide hammer or extraction tool to remove the guide. Be cautious not to apply heat immediately after freezing, as this could cause sudden expansion. Freezing is a non-destructive approach, minimizing the risk of damage to the surrounding material. Proper timing and technique ensure a smooth removal process.

Extracting Without Special Tools
Extracting valve guides without special tools requires careful planning and caution. One effective method is to use a slide hammer, which can generate significant force to pull out the guide. Alternatively, basic tools like wrenches or pliers can be employed, though they may not provide enough force. Applying heat with a hairdryer or heat gun can help expand the metal around the guide, making removal easier, but be cautious not to overheat the cylinder head. Penetrating oil can also be used to loosen corrosion or grime; Safety is paramount; wear gloves and safety glasses to protect against flying debris. If the guide is severely stuck, it may be necessary to seek professional assistance to avoid damaging the cylinder head.
Dealing with Broken or Stuck Valve Guides
When encountering broken or stuck valve guides, proceed with caution to avoid further damage. If the guide breaks during removal, use a drill to create a pilot hole in the remaining fragment. Then, employ an extraction tool or slide hammer to carefully pull out the pieces. For stuck guides, apply penetrating oil to loosen corrosion and let it sit overnight. Heat can also be applied to expand the metal, aiding removal. If the guide is severely stuck, avoid forcing it, as this may damage the cylinder head. In challenging cases, seeking professional assistance is recommended to prevent costly repairs. Safety glasses and gloves should always be worn to protect against debris.
Inspecting and Measuring the Cylinder Head
Inspect the cylinder head for cracks, wear, or damage. Use a micrometer to measure guide bore dimensions and ensure proper alignment. Check surface flatness and cleanliness. Wear gloves and safety glasses for protection.
How to Measure Valve Guide Clearance
To measure valve guide clearance, start by using a dial bore gauge to measure the guide bore’s inner diameter. Compare this measurement to the manufacturer’s specifications. Next, measure the valve stem’s outer diameter using a micrometer. The difference between these two measurements gives the clearance. Ensure the gauge is calibrated and properly seated within the bore for accurate readings. Excessive clearance may indicate wear, requiring reaming or replacement. Always follow the vehicle manufacturer’s guidelines for acceptable clearance tolerances. Proper measurement is critical to ensure correct valve guide installation and optimal engine performance. Wear protective gloves and eyewear during this process for safety.
Assessing Cylinder Head Condition
Before installing new valve guides, inspect the cylinder head for cracks, excessive wear, or damage. Use a straightedge and feeler gauge to check the head’s flatness, ensuring it meets manufacturer specifications. Inspect the valve seats for pitting, burn marks, or uneven wear, as these issues may require machining. Look for signs of head gasket leakage or corrosion, which could compromise the installation. Use a magnaflux test to detect cracks in critical areas. Check the head bolt threads for damage or stripping. If any defects are found, the cylinder head may need reconditioning or replacement before proceeding with valve guide installation. A damaged head can lead to poor engine performance or leaks, even with new guides installed.
Reaming and Preparing the Valve Guide Area
Use a reamer to enlarge worn valve guide holes, ensuring proper fit for new guides. Clean and inspect the area thoroughly before installation to ensure accuracy.
Reaming Techniques for Worn Guides
Reaming is essential for restoring worn valve guide holes to the correct diameter. Start by using a pilot reamer to create a precise guide for the final reamer. Gradually increase the reamer size until the hole reaches the specified dimension. Always maintain proper alignment to avoid misshapen holes. Use cutting oil to lubricate the reamer and prevent overheating. After reaming, inspect the area for any debris or burrs. If the guides are severely worn, consider oversizing them. Finally, clean the area thoroughly with compressed air and solvent to ensure a smooth installation process. Proper reaming ensures a snug, accurate fit for the new valve guides, crucial for optimal engine performance.
Preparing the Area for New Guides
After reaming, the area must be meticulously prepared for the new valve guides. Start by cleaning the cylinder head surface and guide holes using a solvent and compressed air to remove debris. Inspect for any remaining old adhesive or residue and scrape it off carefully. Lightly sand the surrounding area to ensure a smooth, even surface for the new guides. Apply a thin, even layer of high-temperature adhesive to the back of the new guide, following the manufacturer’s instructions. Use an alignment tool to ensure the guide is properly positioned before pressing it into place. Allow the adhesive to set as directed to ensure a secure bond. Proper preparation guarantees a precise fit and prevents future issues. This step is critical for the longevity and performance of the valve guides. Always double-check alignment before final placement.

Installing the New Valve Guides
Ensure the new guides are properly aligned and seated. Use specialized tools to press them into place gently but firmly. Verify correct fitment and alignment before finalizing the installation. Always refer to the manufacturer’s specifications for torque and seating depth. Proper installation ensures optimal engine performance and longevity of the guides. Double-check the valve train operation after installation to confirm everything functions smoothly.
Cleaning and Lubricating the Area
Cleaning the valve guide area is essential before installation to ensure proper fitment and prevent contamination. Use a solvent to remove old lubricants, grime, and debris from the cylinder head and guide bore. Dry the area thoroughly with compressed air to eliminate moisture. Lightly lubricate the new valve guide with motor oil or a specialized lubricant to reduce friction during installation. Apply a thin layer of lubricant to the valve stem as well to ensure smooth operation. Avoid over-lubricating, as excess can attract dirt and cause premature wear. Proper cleaning and lubrication are critical for optimal performance and longevity of the valve train components.
Aligning the New Valve Guides
Aligning the new valve guides is a critical step to ensure proper seating and function. Start by using a dial indicator to verify the guide bore is centered relative to the valve seat. Next, carefully position the new guide into the bore, ensuring it aligns with the valve stem and seat. Use a guide pilot or alignment tool to maintain proper orientation. Gently tap the guide into place using a soft-faced hammer, checking alignment frequently. Avoid forcing the guide, as this could cause misalignment or damage. Once seated, verify the guide is flush with the cylinder head surface and evenly spaced around the bore. Proper alignment prevents engine performance issues and extends the lifespan of the valve train components.
Heat Application for Proper Seating
Heat application is essential for ensuring the new valve guides seat properly. Use a heat gun to warm the cylinder head around the guide bore to approximately 200–300°F. This allows the metal to expand slightly, making it easier to press the guide into place. Apply heat evenly around the bore to avoid uneven expansion. Once heated, carefully press the guide into the bore using a suitable installation tool. Ensure the guide is fully seated and aligned before allowing the head to cool. This process ensures a tight, even fit, preventing future leaks or misalignment. Avoid overheating, as this can damage the cylinder head or guide. Always use thermal protective gear when handling heated components.
Testing and Inspection Post-Installation
After installation, inspect the valve guides for leaks and ensure they are properly seated. Check the valve train operation and alignment to confirm everything functions smoothly.
Checking for Leaks and Proper Seating
After installing the new valve guides, perform a thorough leak test to ensure there are no gaps or improper seals. Use compressed air to pressurize the cylinder head and listen for hissing sounds, which indicate leaks. Visually inspect the valve guide area for any signs of misalignment or improper seating. Check the valve train operation to confirm that the valves move smoothly without binding or excessive play. Ensure the guides are securely seated and aligned with the valve stems. If any issues are detected, reseat the guides or replace the seals as needed. Proper seating and sealing are critical for optimal engine performance and longevity.
Final Inspection and Adjustments
Once the valve guides are installed and tested, conduct a final inspection to ensure everything is in proper order. Verify that all guides are evenly seated and aligned with the valve stems. Check the valve train for smooth operation, ensuring no binding or excessive clearance. Inspect the area for any residual debris or lubricant residue. Apply a small amount of lubricant to the valve stems and guides to facilitate smooth operation. Start the engine and listen for any unusual noises or vibrations, which could indicate improper installation. Address any issues promptly to prevent further damage. This step ensures the repair is reliable and maintains engine performance.
Maintenance and Upkeep
Regular maintenance ensures valve guides remain functional. Inspect for wear, clean debris, and lubricate moving parts. Monitor engine performance and address issues promptly. Schedule routine checks.
Regular Maintenance to Prevent Wear
Regular maintenance is crucial to extend the life of valve guides. Inspect valve guide clearance periodically using a feeler gauge to ensure proper alignment and fitment. Clean the area around the guides to prevent debris buildup, which can cause wear. Lubricate the valve stem and guide with engine oil or silicone-based grease to reduce friction. Check for signs of wear, such as excessive oil consumption or valve train noise. Addressing these issues early prevents further damage. Additionally, ensure the cylinder head is free from cracks or corrosion, as this can affect guide stability. Regular maintenance not only prevents wear but also ensures optimal engine performance and longevity. Always follow the manufacturer’s recommendations for inspection intervals. Consistent upkeep helps maintain proper valve train operation and prevents costly repairs down the line.
When to Replace Valve Guides Again
Determine the need for replacing valve guides by monitoring engine performance and signs of wear. Increased oil consumption, excessive smoke, and engine noise are key indicators of worn guides. If the valve train exhibits significant wear or clearance issues, replacement is essential to maintain proper engine function. Replacing them prevents further damage and ensures optimal performance. Always adhere to proper installation procedures to maximize their lifespan. Regular inspections and timely interventions can significantly enhance engine efficiency and longevity, avoiding costly repairs.

Common Mistakes and Troubleshooting
Common errors include improper alignment, insufficient lubrication, and using incorrect tools. These mistakes can lead to uneven seating or damage to the cylinder head. Always verify guide alignment and ensure proper lubrication before installation. Addressing these issues promptly prevents costly repairs and ensures long-term performance.
Avoiding Common Errors During Installation
During valve guide installation, common errors include improper alignment, insufficient lubrication, and using incorrect tools. Misalignment can lead to uneven wear and poor engine performance. Inadequate lubrication may cause friction and premature damage to the new guides. Using the wrong tools can result in improper seating or damage to the surrounding area. To avoid these issues, ensure precise alignment, apply the recommended lubricant, and use specialized tools designed for valve guide installation. Double-checking measurements and following manufacturer guidelines can significantly reduce the risk of errors. Proper technique and attention to detail are crucial for a successful installation and optimal engine function.
Troubleshooting Post-Installation Issues
After installing valve guides, common issues include leaks, improper seating, or heat-related problems. If leaks occur around the valve guides, inspect the area for proper sealing and ensure the guides are tightly seated. Apply a smoke test or vacuum gauge to identify leak sources. If the issue persists, re-torque the guide or replace it if damaged. Improper seating may cause valve train noise or performance loss; check for debris or misalignment. Heat issues can arise if guides are not seated correctly, leading to premature wear. Address these by ensuring proper installation and alignment. Always refer to the repair manual for specific troubleshooting steps tailored to your engine type.
Installing valve guides requires precision and care. Proper techniques ensure optimal engine performance and longevity. Regular maintenance is crucial for preventing future issues and ensuring reliability.
Installing valve guides involves thorough preparation, precise removal of old guides, and careful installation of new ones. Proper tools and safety measures are essential to avoid damage. Inspecting the cylinder head and reaming the area ensures a smooth fit. Aligning and heating the new guides guarantees proper seating. Post-installation testing is critical to confirm leaks are sealed and performance is optimized. Regular maintenance helps prevent future wear. Following manufacturer guidelines and avoiding common mistakes ensures longevity. Precision and patience are key to a successful installation, as improper techniques can lead to engine issues. Always prioritize quality materials and proper fitting for reliable engine operation.